iOS - View Transitions(視圖轉換)
使用視圖過渡
視圖過渡是一個視圖中添加的另一個視圖,一個適當的過渡動畫效果的有效途徑。
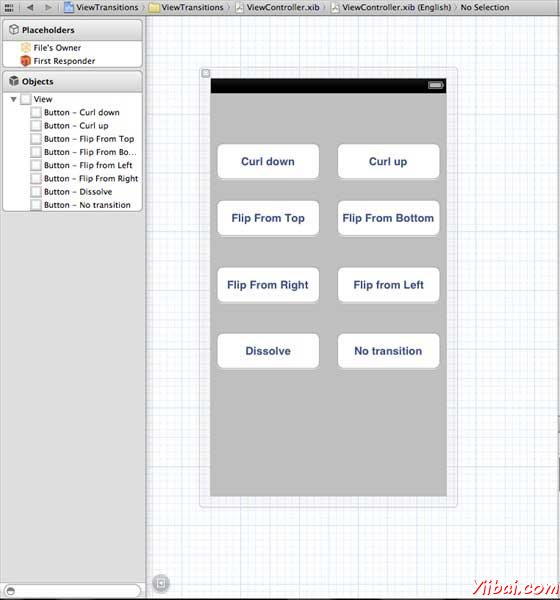
更新 ViewController.xib 如下:

創建的按鈕中創建的動作在 xib 中
更新 ViewController.h 內容
聲明兩個視圖 ViewController 類的實例。ViewController.h 文件將創建動作後,如下所示。
#import <UIKit/UIKit.h>

@interface ViewController : UIViewController
{
    UIView *view1;
    UIView *view2;
}

-(IBAction)flipFromLeft:(id)sender;
-(IBAction)flipFromRight:(id)sender;
-(IBAction)flipFromTop:(id)sender;
-(IBAction)flipFromBottom:(id)sender;
-(IBAction)curlUp:(id)sender;
-(IBAction)curlDown:(id)sender;
-(IBAction)dissolve:(id)sender;
-(IBAction)noTransition:(id)sender;

@end
Update ViewController.m
We will add a custom method setUpView to initialize the views. We also create another method doTransitionWithType: that creates transition from view1 to view2 or vice versa. Then we will implement the action methods we created before that calls the doTransitionWithType: method with the transition type. The updated ViewController.m is follows
#import "ViewController.h"

@interface ViewController ()

@end

@implementation ViewController

- (void)viewDidLoad
{
    [super viewDidLoad];
    [self setUpView];
	// Do any additional setup after loading the view, typically from a nib.
}

-(void)setUpView{
    view1 = [[UIView alloc]initWithFrame:self.view.frame];
    view1.backgroundColor = [UIColor lightTextColor];
    view2 = [[UIView alloc]initWithFrame:self.view.frame];
    view2.backgroundColor = [UIColor orangeColor];
    [self.view addSubview:view1];
    [self.view sendSubviewToBack:view1];

}

-(void)doTransitionWithType:(UIViewAnimationTransition)animationTransitionType{
    if ([[self.view subviews] containsObject:view2 ]) {
        [UIView transitionFromView:view2
                            toView:view1
                          duration:2
                           options:animationTransitionType
                        completion:^(BOOL finished){
                            [view2 removeFromSuperview];
                        }];
        [self.view addSubview:view1];
        [self.view sendSubviewToBack:view1];
    }
    else{

        [UIView transitionFromView:view1
                            toView:view2
                          duration:2
                           options:animationTransitionType
                        completion:^(BOOL finished){
                            [view1 removeFromSuperview];
                        }];
        [self.view addSubview:view2];
        [self.view sendSubviewToBack:view2];

    }
}


-(IBAction)flipFromLeft:(id)sender
{
    [self doTransitionWithType:UIViewAnimationOptionTransitionFlipFromLeft];

}
-(IBAction)flipFromRight:(id)sender{
    [self doTransitionWithType:UIViewAnimationOptionTransitionFlipFromRight];

}
-(IBAction)flipFromTop:(id)sender{
    [self doTransitionWithType:UIViewAnimationOptionTransitionFlipFromTop];

}
-(IBAction)flipFromBottom:(id)sender{
    [self doTransitionWithType:UIViewAnimationOptionTransitionFlipFromBottom];

}
-(IBAction)curlUp:(id)sender{
    [self doTransitionWithType:UIViewAnimationOptionTransitionCurlUp];

}
-(IBAction)curlDown:(id)sender{
    [self doTransitionWithType:UIViewAnimationOptionTransitionCurlDown];

}
-(IBAction)dissolve:(id)sender{
    [self doTransitionWithType:UIViewAnimationOptionTransitionCrossDissolve];

}
-(IBAction)noTransition:(id)sender{
    [self doTransitionWithType:UIViewAnimationOptionTransitionNone];

}

- (void)didReceiveMemoryWarning
{
    [super didReceiveMemoryWarning];
    // Dispose of any resources that can be recreated.
}

@end
Output
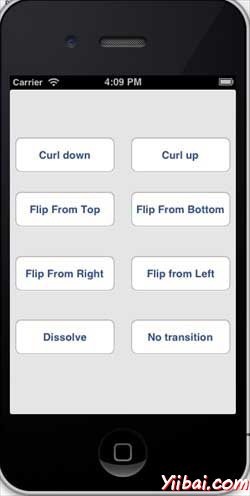
Now when we run the application we'll get the following output.

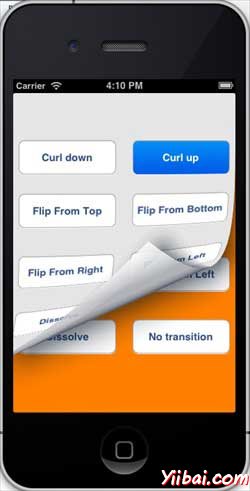
You can select different buttons to see how the transition works. On selecting a curl up the transition will be as follows.


